Aspire X-Navigator: A High End Gaming Chassis
by Purav Sanghani on October 26, 2004 12:05 AM EST- Posted in
- Cases/Cooling/PSUs
Internal Design
Looking through the left side window, we have a good idea of what we're going to be dealing with when we open the X-Navigator: 1/3 of the case occupied solely with drive bays, a plethora of case fans, and enough room to fit a 747 on the motherboard tray. Well, not exactly a jumbo jet, but there is still plenty of room inside the case to work freely with any component.The 5-1/4" drive bays are easy to work with, thanks to the use of drive rails to secure drives in the bays. The drive rails require them to be screwed onto drives to be utilized, which somewhat defeats the purpose, since the main goal is to create a tool-less environment. Still, many average users don't often replace their drives to require screw-less drive rails.
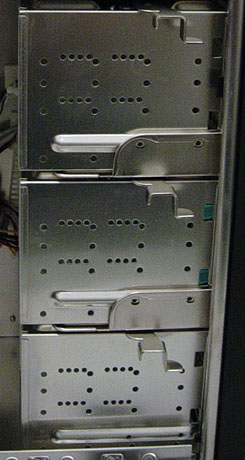
That is not the end of it, though. Upon further inspection, we notice that the 3-1/2" drive bays are split into three separate cages, which could all be removed easily to install HDDs. This provides for a greater possibility for expansion in the future to add as many as 9 HDDs. HDDs need to be screwed into the cages, which helps secure them and reduces the chance of damage from vibrations. We would have liked to see drive rails being used here also, but we were satisfied with the amount of bays provided.
Moving on to the rear of the X-Navigator, we expect the expansion card slots to be as feature-full as the rest of the case. Instead, Aspire has decided to keep this area as simple as possible by staying away from sliding clips or other locking mechanisms and sticking to traditional screws. The upside to this is that screws are known to be the most secure method of securing expansion cards to slots and holding them there no matter how rough the case is handled.
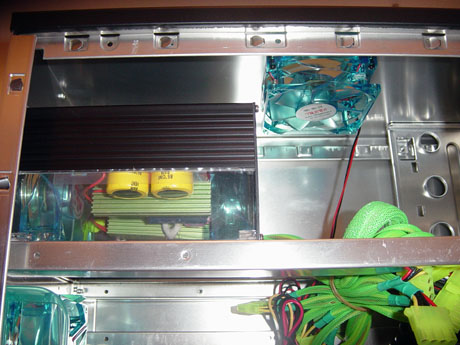
All the way at the top of the case at the back is the location of the power supply. This area is the roomiest that we have seen in cases to date. Not only will our large 520W PowerStream unit slide in easily, but it will have over 2" of space above the power supply as well as 1" on each side for even easier removals and replacements. There was also no interference with the top mounted fan with all of that extra buffer space.


23 Comments
View All Comments
Locut0s - Tuesday, October 26, 2004 - link
Perhaps the second paragraph on the first page should be italicized. It's not obvious at first that it's clipped from the company line. For a second it seemed like the article was being written by Aspire.Locut0s - Tuesday, October 26, 2004 - link
SKiller - Tuesday, October 26, 2004 - link
There seems to be a picture missing on page 2.Great looking case. Would be perfect if it had:
A. Tool-less design (for drives & expansion cards.
B. Quiter fans (and have the front intake be 120mm).
C. A more elaborate side panel. Something with an unusual shaped window and maybe etched, UV sensetive design/picture.
D. Maybe a 'No PS' option for about $120.